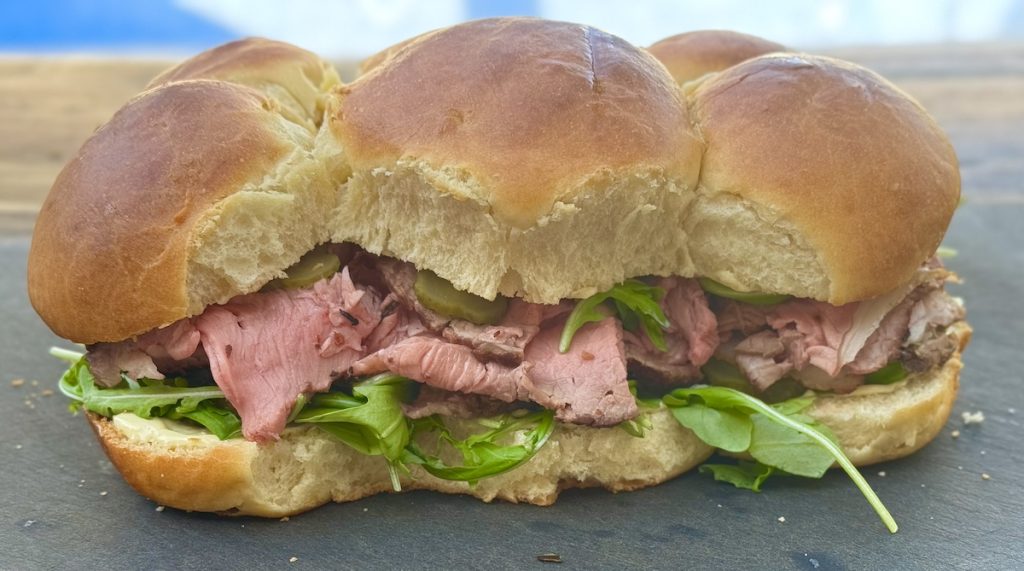
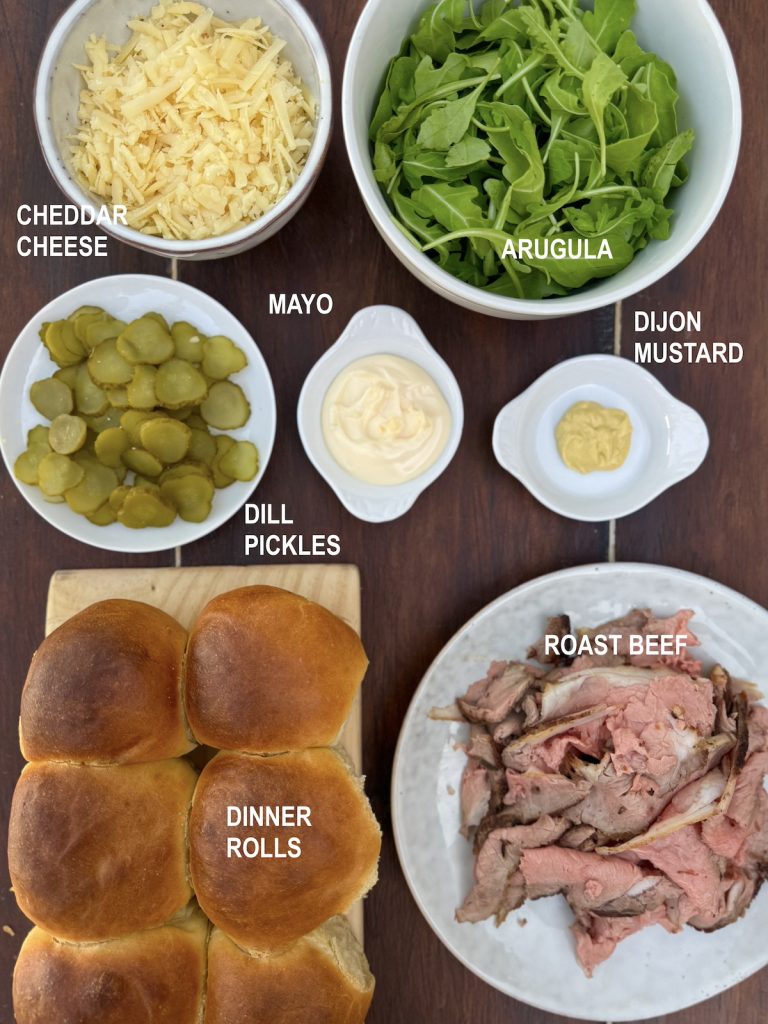
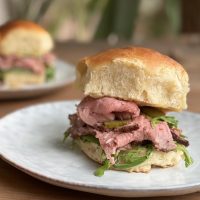
Are you having a cookout or a pool party? Let me share my Roast Beef Sliders recipe with you. There’s very little preparation work, and the result is phenomenal — juicy, pink, roast beef, mixed with all your favorite slider toppings.

Regular sliders are all very well, but they depend on the mini burgers being grilled right at the last moment, and served hot. With roast beef sliders, you can get all the preparation work out of the way before your guests even arrive. All you need to do is to melt the cheese as you’re assembling them with ready-prepared fillings. And if you get dinner rolls that are attached to each other, it’s even easier! Assemble one big batch, then slice them into individual mini sliders at the end. I made mine in two batches of six rolls each, and by the time I’d finished the second batch, the first had already completely disappeared!
Roasting Your Own Beef
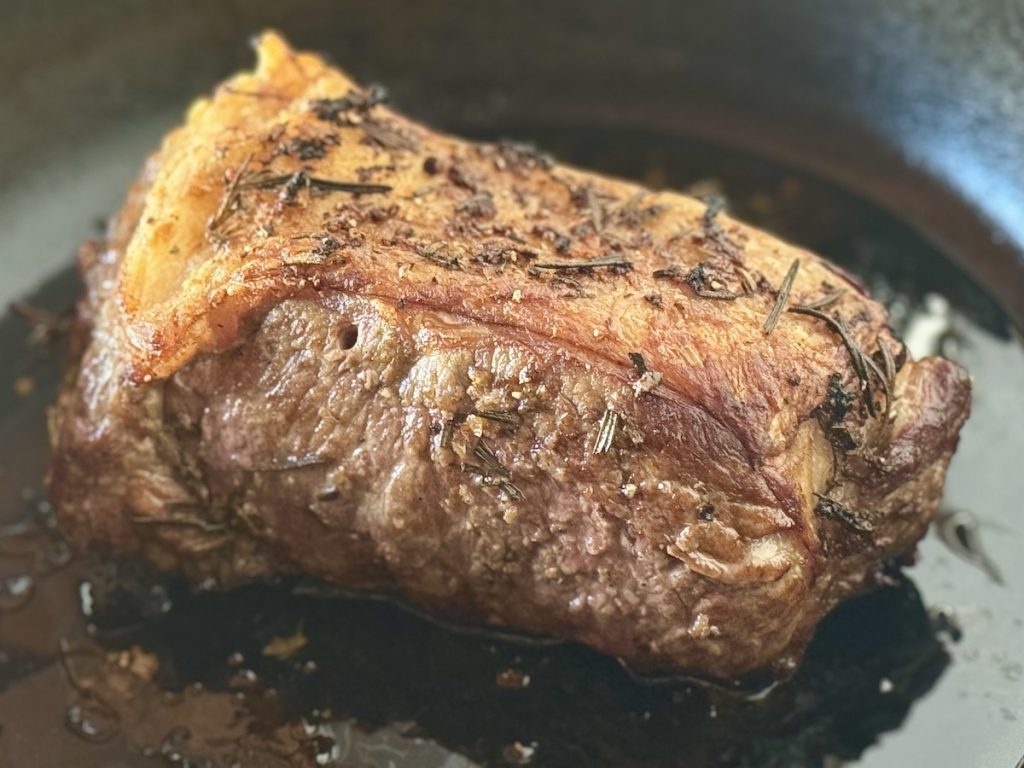
If you want to save yourself time, you can buy roast beef from the store, already roasted and sometimes even already sliced. But I really think it’s worth doing it yourself — the beef I see at the store never looks quite as pink and juicy as my own roast beef. Plus when you make it yourself, you know exactly what’s gone into it. No preservatives, no artificial coloring, just lightly seasoned beef with natural flavors.
Slicing the Beef
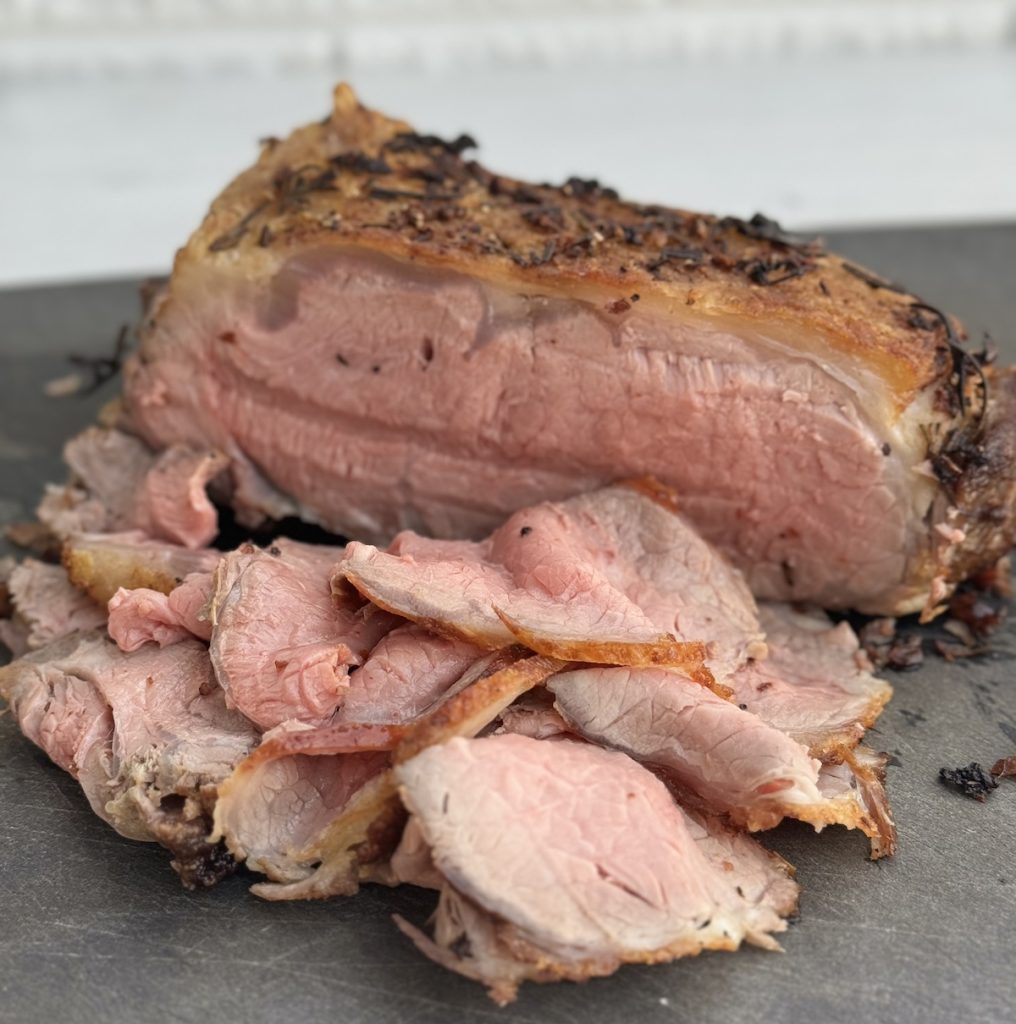
The key to acing this recipe is to slice the beef as thinly as you can. Not only does that make for each bite to be as tender as possible, with no chewiness, it also maximises taste. With thinner slices, there is simply more surface area of delicious beef to hit your tastebuds and wow you with its incredible beefy flavor! Here’s how to do it.
- Get the beef really cold: You can even put it into the freezer for 20 minutes, if necessary. Cold meat is much firmer, making it easier to slice thin pieces.
- Slice across the grain: You’ll see fibers running through the meat. Hold the blade of your knife perpendicular to the direction of the fibers and slice across them. This yields more tender meat.
- Use a sharp knife: Get out the best, sharp, unserrated knife that you have. If you have a knife-sharpener, sharpen your knife just before slicing the beef.
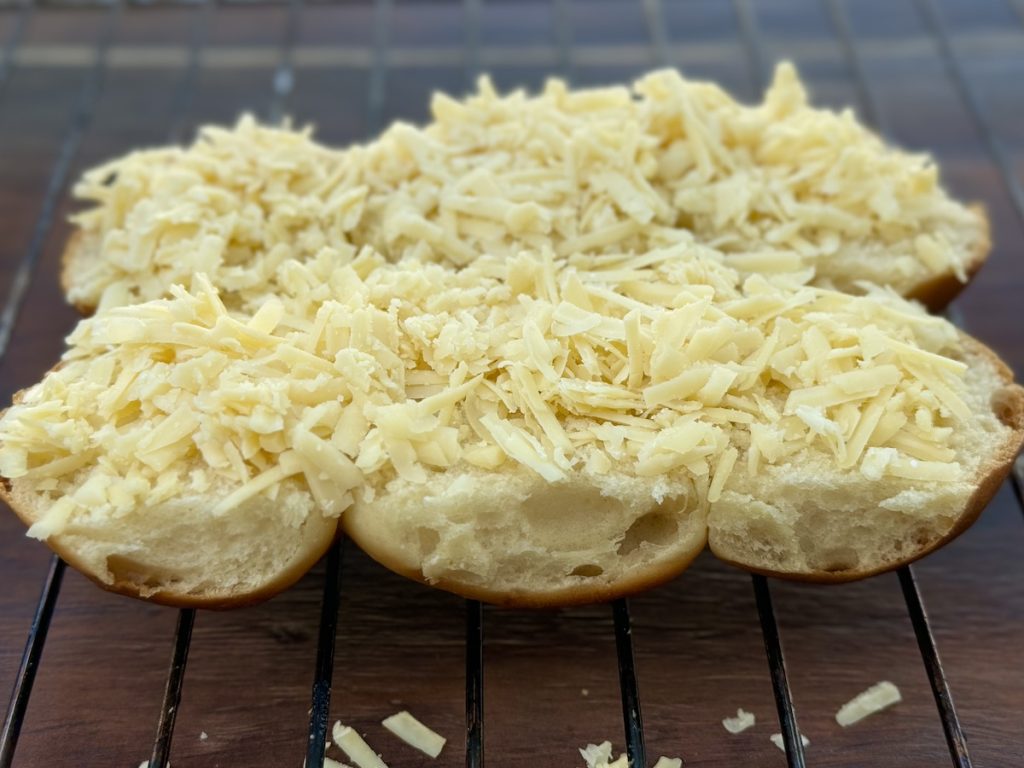
Attached Dinner Rolls
You can certainly still make this recipe with individual rolls or buns that are not attached to one another. But it will be a lot messier! Piling all the fillings up on each separate bun means that half of them fall out, and you’re playing a complicated stacking game. By buying batch baked Hawaiian rolls, or similar, you can prepare a whole set of roast beef sliders in one go — both top and lower halves.
Getting Prepared
It might sound silly, but it makes life so much easier to get all your ingredients ready-prepared. Sometimes I think I can slice the dill pickles and do everything else while the cheese is melting under the broiler, but I always regret it when I run out of time and get flustered trying to finish it all off! For this recipe, preparation is key. Set all your ingredients out in advance.
Variations
One of the joys of this recipe is how adaptable it is. I love roast beef sliders with this combination of flavors, but you could also try:
- Fresh cherry tomatoes instead of dill pickles.
- BBQ sauce instead of mayonnaise.
- Romaine lettuce instead of arugula.
- Grainy mustard instead of Dijon mustard.
- Add some crispy bacon, or even a fried quail egg if you want to get really fancy!
- Gooey Taleggio cheese, a mild Emmenthal, or even Stilton will all be good replacements for the cheddar.
Storage
The roast beef sliders are best eaten directly after assembling. But you can prepare all the separate filling components in advance and store them separately.
- Roast the beef, leave to cool, then wrap the whole piece in plastic wrap. Store in the fridge for up to 4 days (or in the freezer for up to 3 months.) Use the sliced beef within 2 hours of slicing, for the best results.
- Grate the cheese in advance and leave in an airtight container in the fridge until ready to assemble.
- Slice the pickles in advance and store in an airtight container in the fridge.
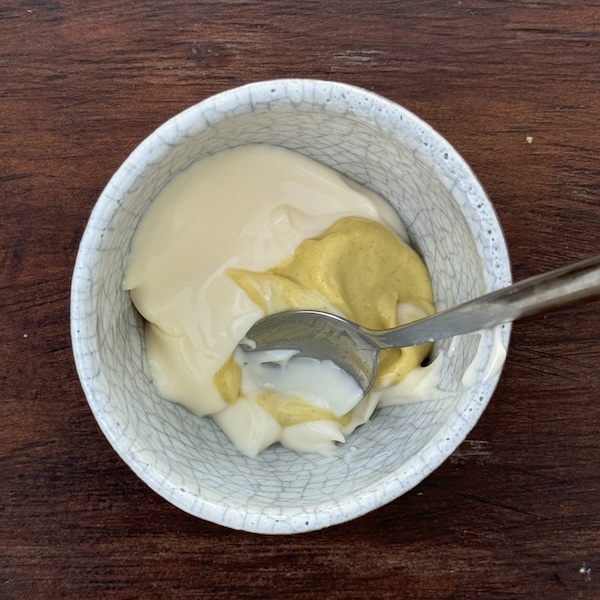
- Mix the mustard with the mayonnaise and store in the fridge. It will stay good for at least a week.
Let’s Get Cooking!
Now you know how to roast your beef and make Roast Beef Sliders, what’s stopping you from making these delicious bites for your next grill party? Try pairing them with a selection of my other healthy summer dishes, for a beautiful tasty spread:
- Cream Cheese Stuffed Peppers
- Summer Quinoa Salad
- Cantaloupe Salad with Prosciutto
- Crispy Baked Okra Fries
Roast Beef Sliders
Ingredients
For the Roast Beef
- 1 1/2 lb raw ribeye beef in the piece
- 2 tbsp olive oil
- 2 cloves of garlic
- A sprig of rosemary
- salt and pepper
For the Sliders
- 1 lb medium-rare roast beef cut in thin slices
- 12 slider buns or Hawaiian rolls
- 2 cups arugula or other green salad leaves
- 8 oz cheddar cheese grated
- 8 large dill pickles sliced
- 4 tbsp mayonnaise
- 2 tsp Dijon mustard
Instructions
For the Roast Beef
- Preheat the oven to 400°F (200°C).
- Peel and finely chop the garlic and finely chop the rosemary. Mix with the olive oil and some salt and pepper.
- Spread the olive oil all over the beef.
- Heat a heavy-bottomed, ovenproof skillet over high heat and sear the beef on all sides, about 3-4 minutes in total.
- Transfer to the oven and roast for about 10-12 minutes, until an instant-read themometer reaches 130°F (55°C). This will give you juicy, pink, medium-rare beef.
- Leave to rest for at least 15 minutes before slicing. If you want, you can do this the day before, wrap the meat in plastic wrap and store in the refrigerator. Slice the following day, and use to make the sliders within 2 hours of slicing.
For the Sliders
- Slice the dinner rolls in half horizontally.
- Turn the top halves upside down on a grill rack, and sprinkle with the grated cheddar cheese.
- Put under the broiler setting on your oven for 2-3 minutes, until the cheese has melted.
- Mix the mayonnaise with the mustard. Spread the lower half of the buns with the mustard mayo.
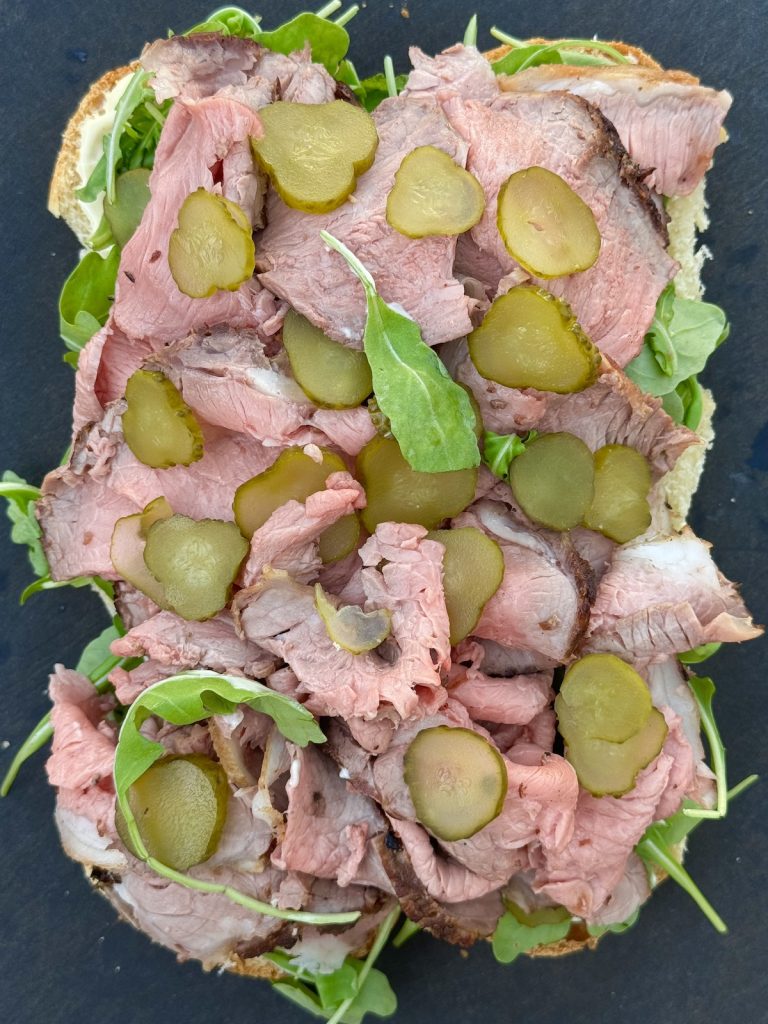
- Add the arugula, dill pickles and sliced roast beef, spreading them all evenly between the rolls.
- Take the top half of the buns with the melted cheese out of the oven and top the lower half with them.
- Use a sharp knife to slice the filled rolls into individual sliders, and serve immediately.


No Comments