If you have ever wandered through a bustling Malaysian street market, you have likely been drawn in by the rhythmic sound of dough being tossed and slapped against a metal counter. Roti Canai is the ultimate comfort food, offering a unique combination of crispy, edges and a soft, buttery interior. While it might look like a simple flatbread, there is a true art to achieving those famous layers. Today, I want to show you that with a little patience, anyone can master this delicious staple at home.
What is Roti Canai?
Roti Canai is a traditional flatbread that is most commonly associated with Malaysia, though its roots are deeply planted in the culinary traditions brought over by Indian immigrants. It is a wonderful example of how food travels and evolves over time.
Unlike a thick and chewy naan which is leavened with yeast and baked in a clay oven, or a thin and pliable flour tortilla from Mexico, Roti Canai is defined by its incredible lamination. It is an unleavened bread that relies on a high fat content and a specific folding technique to create dozens of microscopic layers. In Malaysia, it is a staple for breakfast or a late night snack, often served at small outdoor stalls. It represents a perfect balance of textures, being simultaneously crunchy on the outside and tender on the inside, which makes it stand out from almost any other flatbread you might find around the world.
Roti Canai? Roti Paratha? What’s the difference?
You might occasionally find yourself confused by the different names listed on menus at Southeast Asian or Indian restaurants. It is helpful to know that Roti Canai and Roti Paratha are essentially the same thing. The difference in name is mostly down to geography and local dialects. In Malaysia, it is almost universally called Roti Canai, which some believe refers to Chennai in India. However, if you are in Singapore or parts of Southern India, you will more likely hear it referred to as Roti Prata or Paratha. While small regional variations in the type of fat used or the exact tossing method exist, the core recipe remains identical.
What Makes Roti Canai Special?
The magic of Roti Canai lies entirely in its flaky layers, and achieving them is the most rewarding part of the whole process. This is the most complex part of the recipe because it requires a bit of finesse.
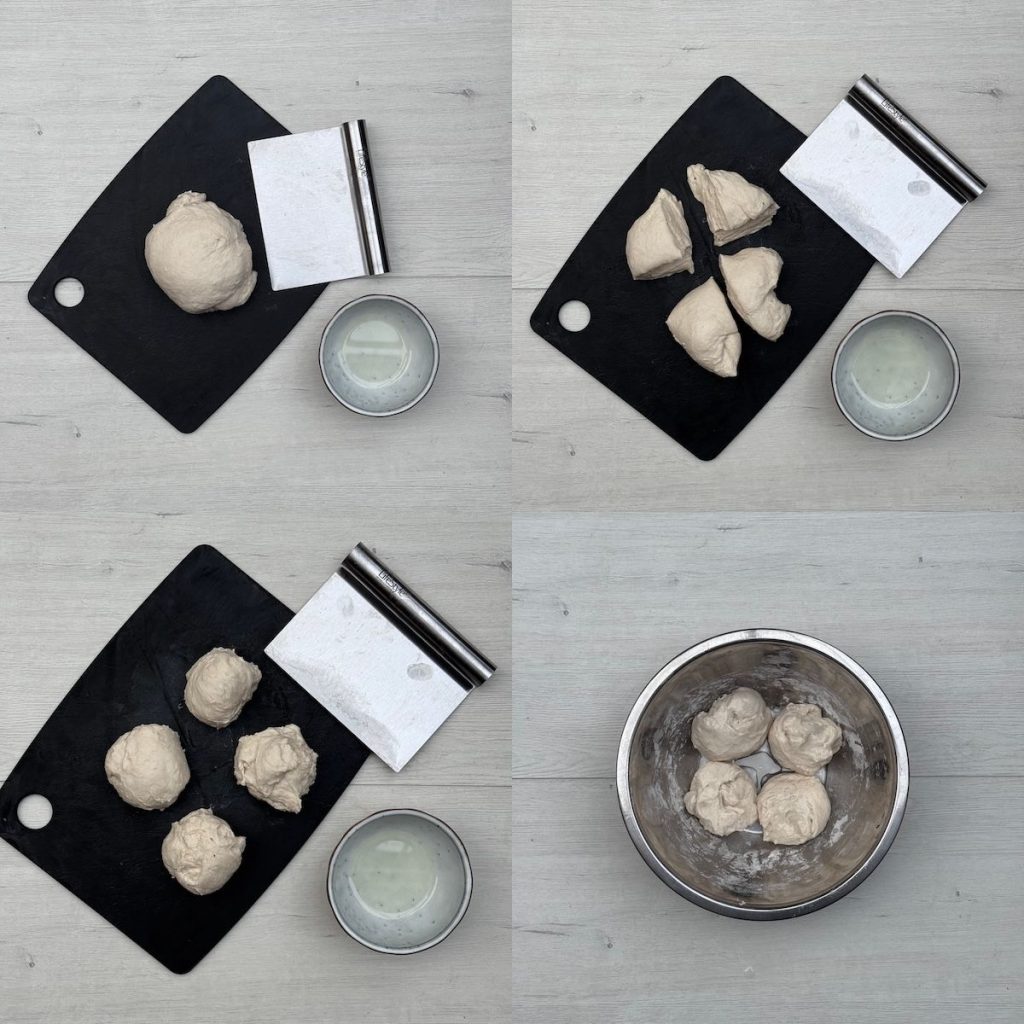
To start the dough, we use boiling water because the heat partially gelatinizes the starches. This makes the final bread much softer and more pliable for stretching. After mixing everything into a rough ball, it is essential to leave it for thirty minutes.
This rest allows the flour to fully hydrate, making the subsequent kneading much easier and more effective. You should then knead the dough until it is completely smooth and takes on a beautiful satiny sheen. This satiny look is a great sign that the gluten has developed enough strength to be stretched paper-thin later without any frustrating tears. Divide into four pieces, and let’s get rolling!
How to Roll Roti Canai
The goal is to roll it out until it is paper thin. You should almost be able to see through it. Once you have stretched it out, spread it with plenty of softened butter or ghee and roll it up into a long rope, which you then coil into a double loop before rolling it out one final time.
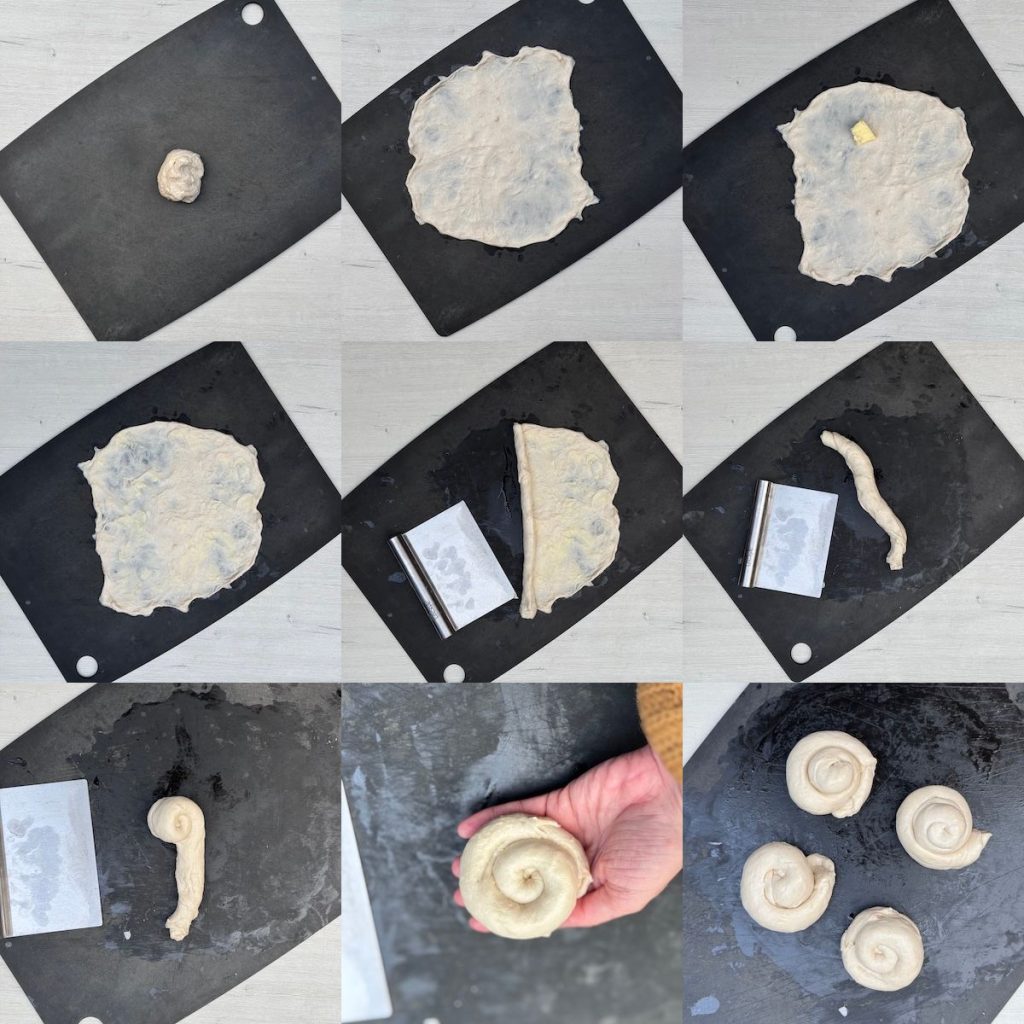
This is the exact same principle that gives high end puff pastry its wonderful flaky layers. You are essentially creating thin sheets of dough separated by layers of fat. When the bread hits a hot pan, the moisture in the fat turns into steam, which forces the layers of dough apart and creates that signature flakiness. I also want to emphasize that the resting steps in this recipe are absolutely vital. Resting the dough allows the gluten to relax completely. If the gluten is too tight, the dough will act like an elastic band and snap back when you try to stretch it, making it impossible to get it thin enough for those perfect layers.

How to Serve Roti Canai
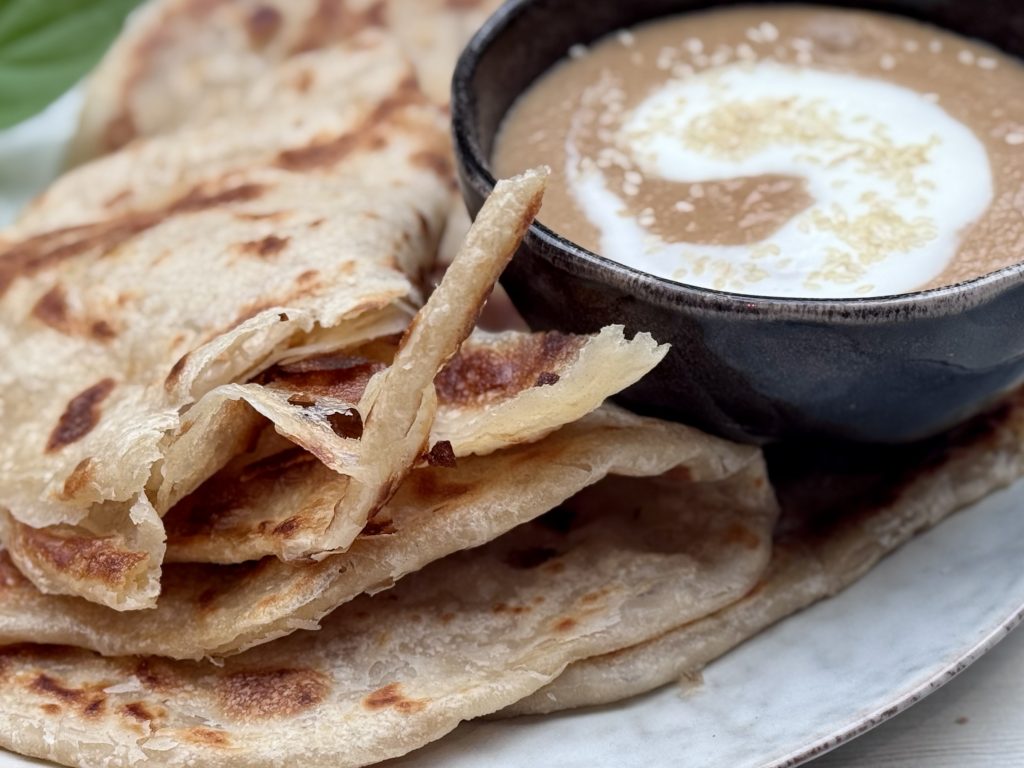
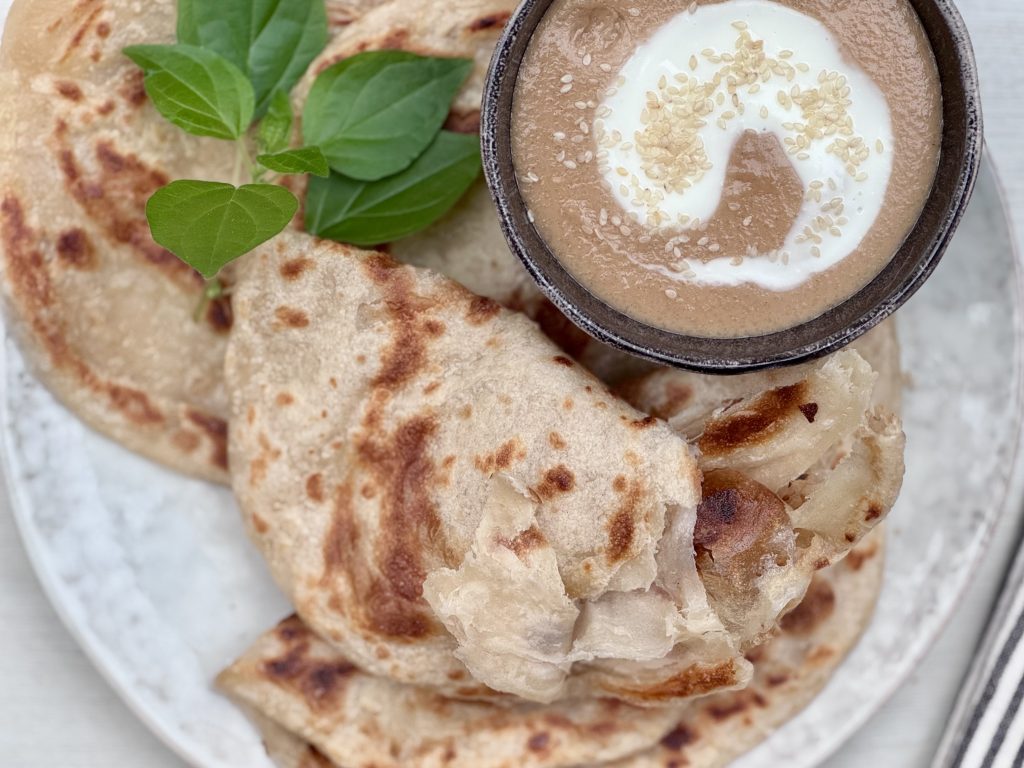
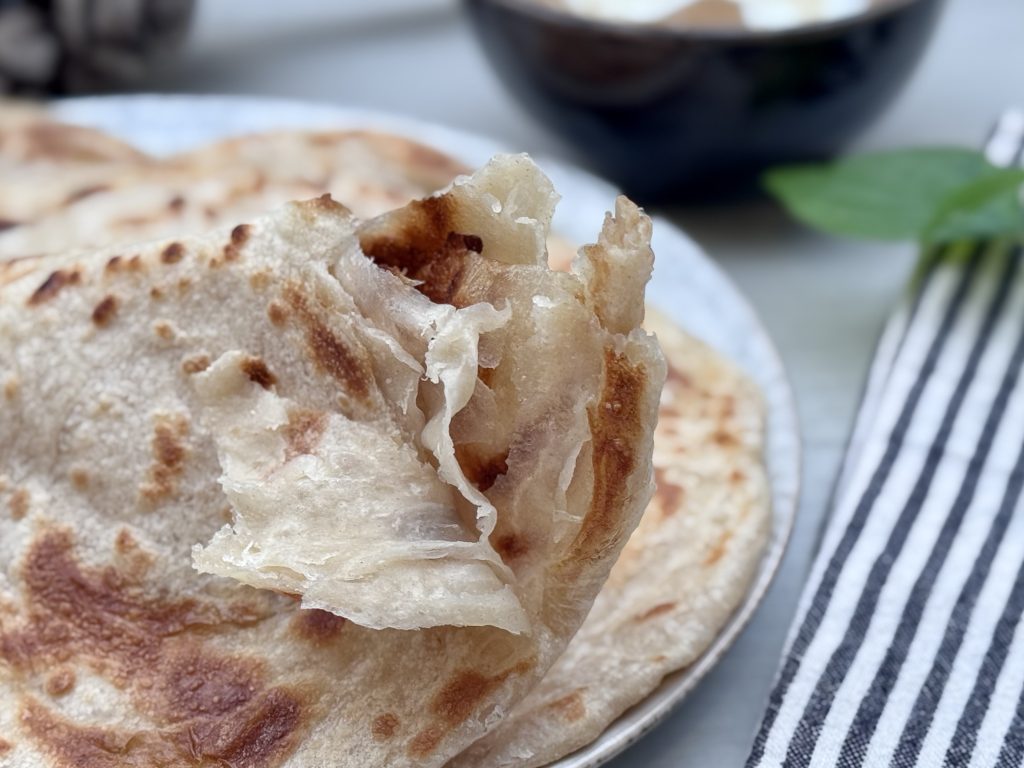
Roti Canai is most famously served as a fantastic side dish for rich, spicy curries and hearty stews. The bread is designed to be torn apart by hand and used as a vessel to soak up every last drop of sauce. However, you do not always need a full meal to enjoy it. You can simply tear off bits and use them to scoop up various dips, chutneys, or pickles for a quick and satisfying appetiser.
These flatbreads are definitely at their absolute best when they are served fresh and hot right out of the pan. If you have any leftovers, they keep quite well in the fridge and can be briefly reheated in a dry, hot pan the next day to restore that lovely crunch.
And More…
Looking for more Asian recipes? I have plenty! Try one of these:
Conclusion
It might take a couple of tries to get the stretching technique down perfectly, but even your first attempt at Roti Canai will taste significantly better than anything from a frozen package. There is something so satisfying about pulling apart those buttery layers that you created from scratch. Grab some flour and butter and give it a go this weekend, and let me know how yours turns out!
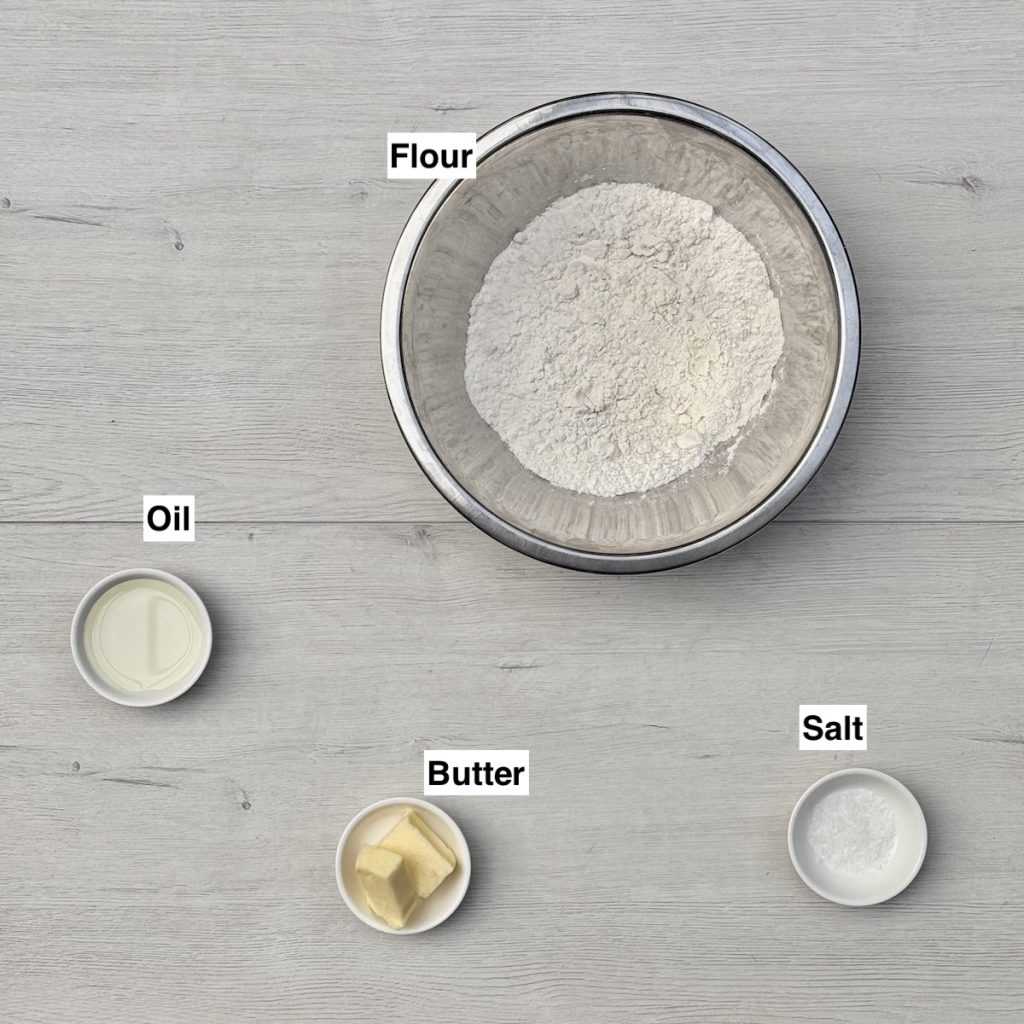
Ingredients
- 2 cups flour
- 1/2 tsp salt
- 3/4 cup water divided in half
- 1 tbsp sunflower oil
- 2 tbsp butter or ghee
Instructions
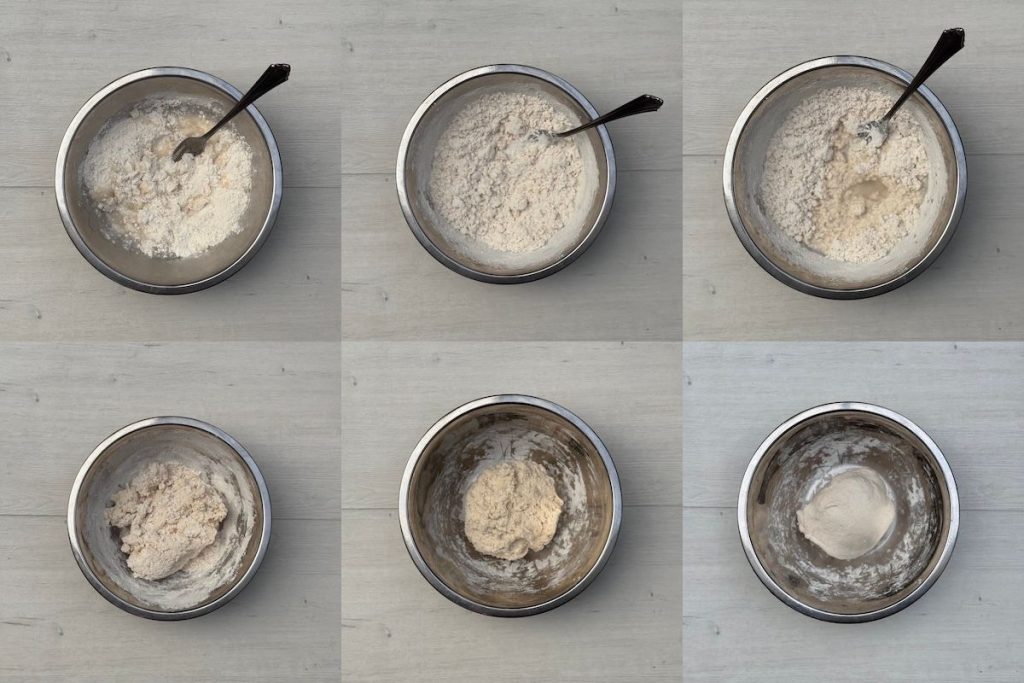
- Mix the flour and salt.
- Heat half the water until boiling. Pour over the flour and stir with a spoon until rough and lumpy.
- Add the remaining water at room temperature. Stir into a rough mass, soft but not sticky. Cover with plastic wrap and leave for half an hour.
- Knead the dough lightly until smooth and satiny. Divide into four pieces, roll each one in the sunflower oil, cover and leave for another half hour.
- Stretch the dough pieces out very thinly on a lightly oiled board. Spread with the butter, and roll up into a sausage, then crosswise into a spiral. Flatten lightly with your hand. Leave for half an hour.
- Stretch or roll each roti canai out into a large round of about 7 inches. Fry in a hot, dry pan for about 2 minutes on each side, until golden brown, flaky, and beautiful.


No Comments